They say that life comes full circle i.e. you start and end at the same point. However, in my humble opinion, that is not true. Life is like an unending spiral. You do tread a circular trajectory, but end up at a different point than the previous one and technology, is no exception to this. In this article, we will discuss a similar journey of Data Engineering in Microsoft Data stack through Azure Data Factory Data Flows.
Before ADF
Although ADF has evolved to be a beacon of Data Engineering and orchestration in Microsoft technologies, it was preceded by SSIS. The latter was a perfect fit for the Information systems requirements since it was ETL paradigm back in those days. Within SSIS, Data Flow Task has been the heart of the ETL process.
Related article: Comparing SSIS Lookup and SQL Joins
However, SSIS could handle typical ETL workloads of traditional information systems. With an increase in scale, developing and maintaining SSIS packages was an onerous task; especially in the cloud. Furthermore, metadata dependence hindered the ease of development and deployment of these packages.
Related article: Introduction to SSIS and making it metadata independent
Hence, with the explosion of cloud and big data, Microsoft came up with Azure Data Factory.
Azure Data Factory before Data Flows
As data exploded in terms of 3V’s of big data, cloud technologies took precedence over on-premises systems. In the space of information systems, ETL systems evolved into ELT systems. Hence, new technologies emerged to support emerging trends. Azure Data Factory was one such tool.
Related article: What is a Data Hub: Concepts and Guidelines
A close look at Azure Data Factory reveals that it is primarily an ELT tool since the Copy Data activity is the primary activity as opposed to the Data Flow Task in SSIS. The former is used to extract the data and load it into a data store like Data Lake, while the latter performs the complete extract, transform and load.
Related article: Lambda Architecture with Azure Databricks
The copy data activity in the Azure Data Factory is generally accompanied by a transformation layer like Azure Databricks notebook activity. This completes a full flow of extraction, loading and transformation i.e. the ELT in Azure Data Factory. However, there are certain nuances to this.
Related article: Move Files with Azure Data Factory- End to End
Firstly, ADF is dependent on other services for transformation like Azure Databricks. This introduces coupling dependencies with other services. Furthermore, transformations in Azure Databricks is code-intensive and entails a learning curve for traditional ETL developers. We can’t say that these are drawbacks in any sense. However, life gets easy if ETL developers can get a familiar feel while evolving to a new tool like ADF from SSIS. Here, Azure Data Factory Data Flows comes to their rescue.
The emergence of Data Flows in ADF
It is always great to have options to choose from. Earlier in ADF, ELT was the only way out since transformations were not possible while moving the data using copy activity. To do so we had to rely on technologies like Azure Databricks or Azure Data Lake analytics. However, with demands for adding ETL capabilities, Microsoft came up with Data Flows. A closer look at Data Flows will remind you of the SSIS Data Flow Task (DFT). Hence, without wasting any further time, let’s dive straight into Data Flows.
For demonstration, we would like to use NFL basketball players data available on kaggle. We have stored the data in an Azure Data Lake gen2. The source is the container named nflplayerscontainer, while nflplayerssink is the sink.

The files in the container nflplayerscontainer are as follows.
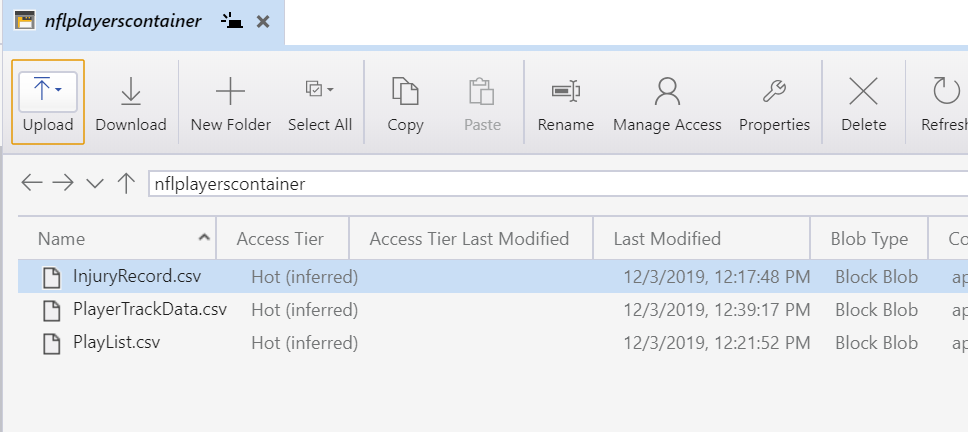
In the Data flow that we will be building, two files viz. InjuryRecord and PlayerTrackData will be joined and stored in the sink folder. Go to the ADF resource that you have created and click on the ‘+’ icon and select Data Flow.
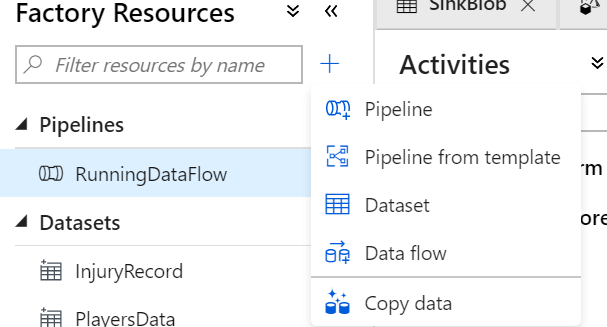
This will open up a new window with two options.
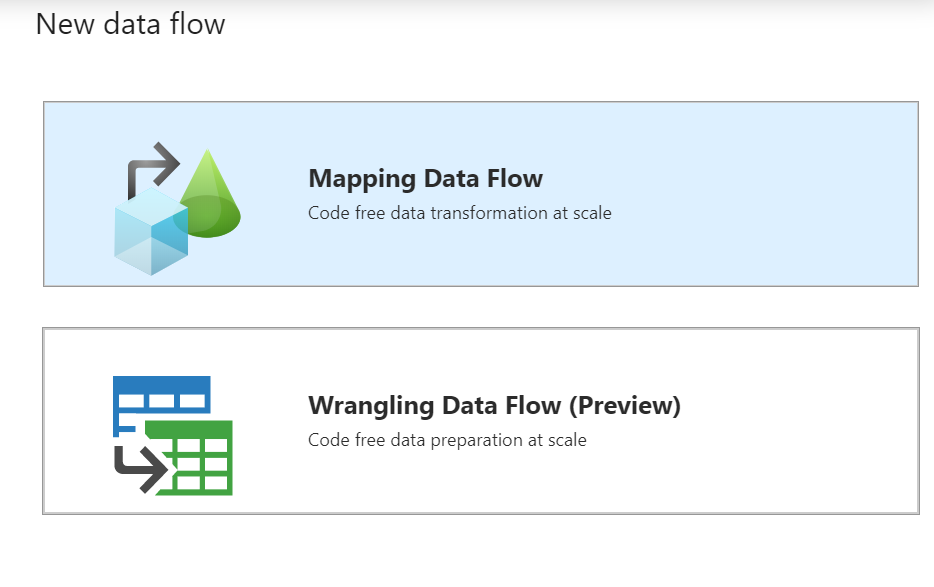
In this article, we will elucidate upon Mapping Data Flow. However, we encourage you to try out wrangling data flow which is in preview. The latter is similar to Power BI data flows with power query support to wrangle with the data. Read more about wrangling data flow here.
Mapping Data Flow
When you select Mapping Data Flow, a new window opens up as shown below.
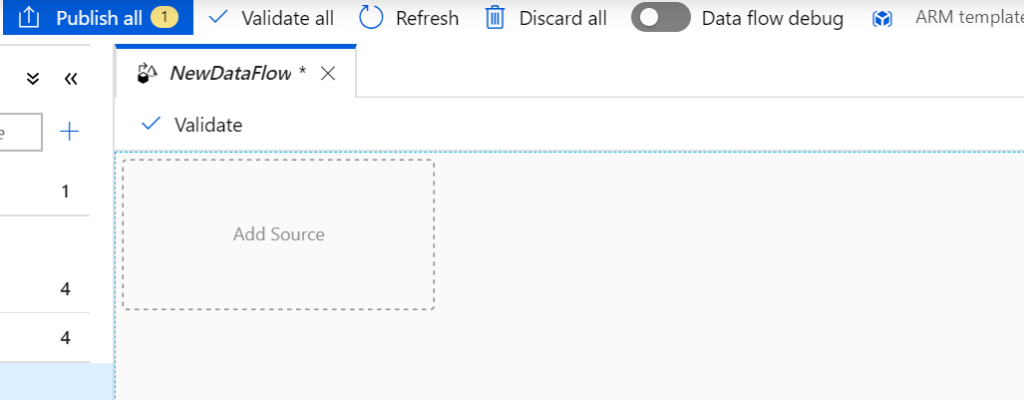
Step 1: Source connections i.e. extraction
Click on Add Source. Name the stream name appropriately and select a Source dataset.
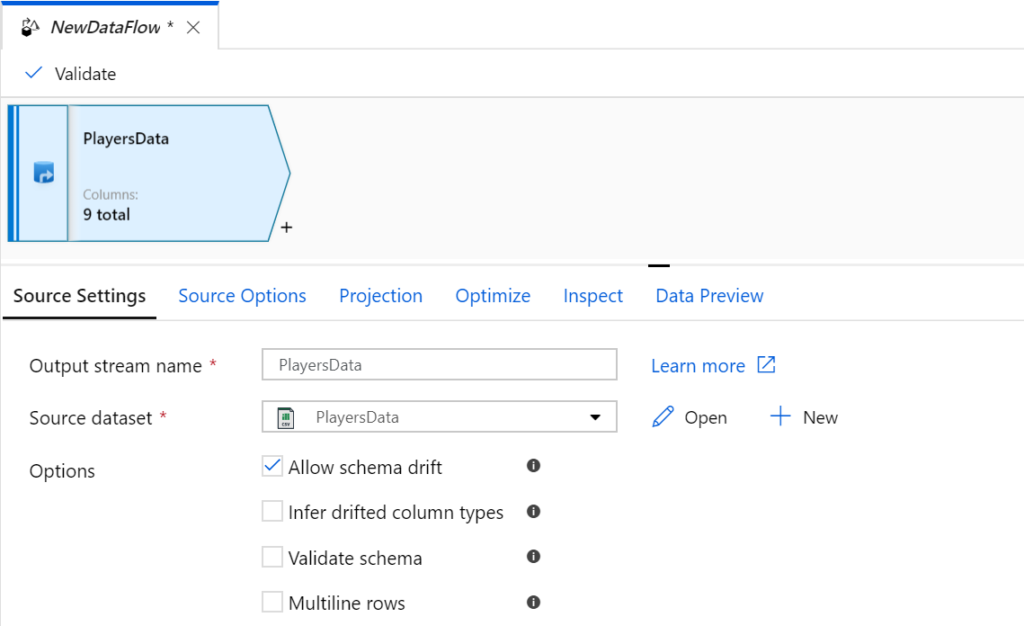
Please note that the creation of Datasets is similar to that of Copy Data activity. To elaborate, the Datasets are common entities across all the activities of the Data Factory. In this case, I have reused an existing dataset which points to an Azure Data Lake gen2 container nflplayerscontainer (this connection to the container is also called as linked service). For creating a linked service and dataset and connecting to a data source/sink read this article.
Similarly, add InjuryRecord dataset.
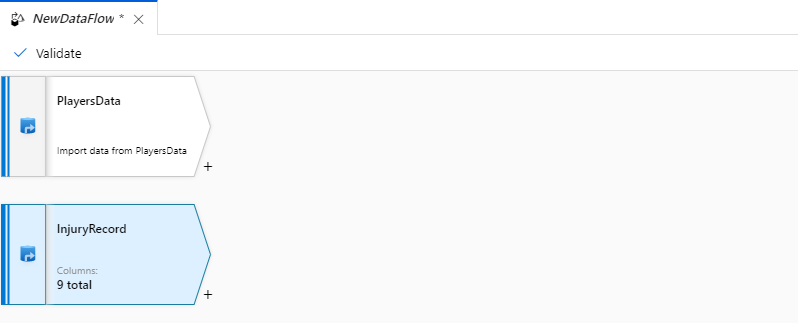
Step 2: Transformations
Now, click on the + sign on one of the datasets and you will see multiple transformations.
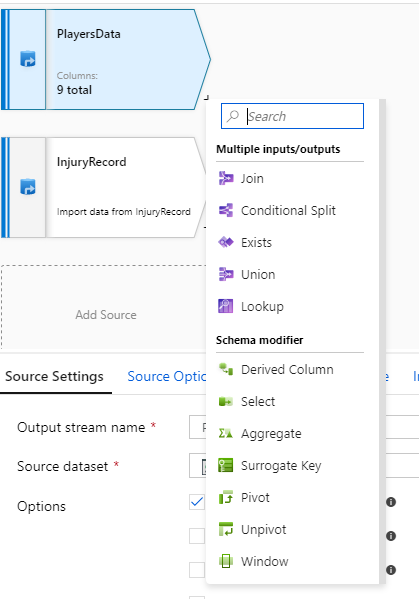
We will use a simple Join to join the two datasets.

Step 3: Loading to sink connection
After configuring the joins click on the ‘+’ symbol in front of the Join component and select Sink. In this case, our sink is another folder in the same data lake store named as nflplayerssink.
There are a couple of considerations while configuring your sink. Firstly, configure the settings to get your results in a single file, as shown below.

Secondly, configure your mapping by removing the Auto mapping. Remove your duplicate and unnecessary columns. However, if you wish to keep the Auto mapping, make sure that you check the Skip duplicate input/output column checkboxes.
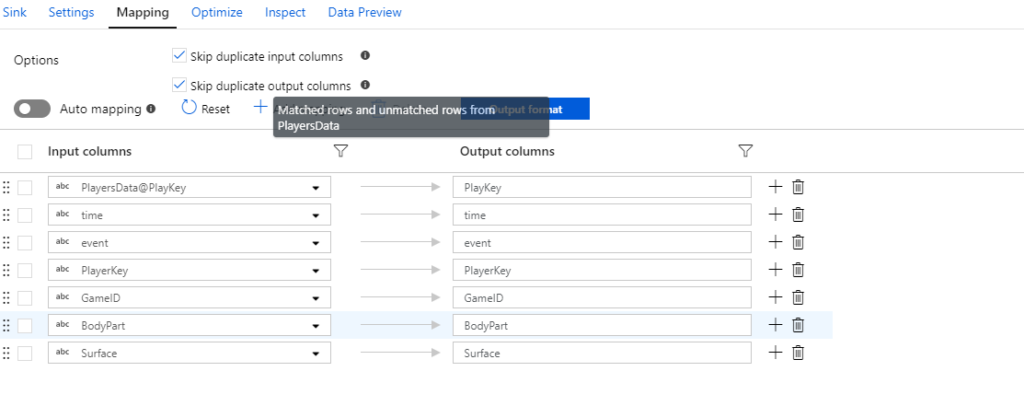
Lastly, please note the checkbox called ‘Allow schema drift’ in both source and sink.
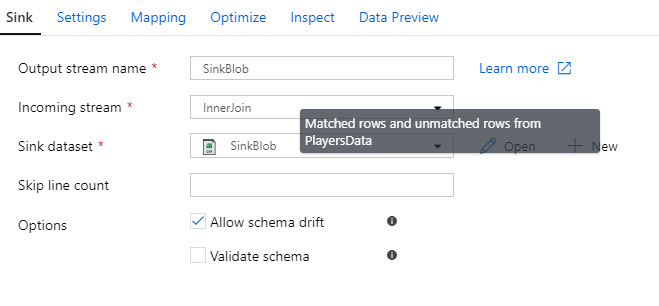
Schema drift allows your pipelines to be dynamic i.e. changes in source and sink schema are automatically adjusted.
Step 4: Running the Data Flow in a pipeline
Click on Publish to save your changes. Furthermore, turn on the Data flow debug switch on the top of your Data flow. This debug option provisions spark clusters in your Integration runtime, which is the underlying compute of ADF. This is one of the primary benefits of Data Flows i.e. you can leverage the power of Spark, without having to write code.
Now, Data Flow is one activity of the Azure Data Factory. Hence in order to execute the Data Flow, create a new pipeline and drag a new Data Flow activity.
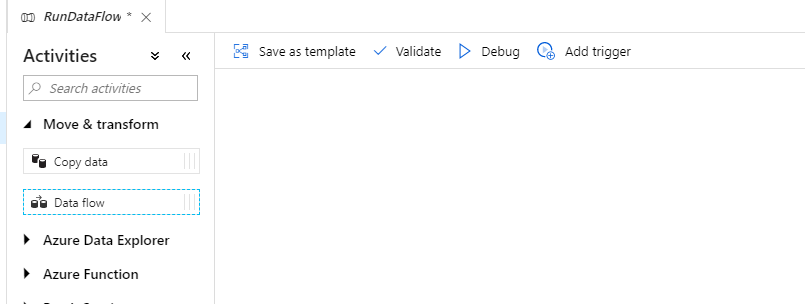
Select an existing dataflow i.e the dataflow we have created throughout this article, along with your Azure IR. Run your pipeline and click on the watch window to monitor the progress of your data flow.

Now, let us see the results.


Conclusion
We hope that you find this introduction to ADF data flows useful. Please note that this article is for information purposes.

