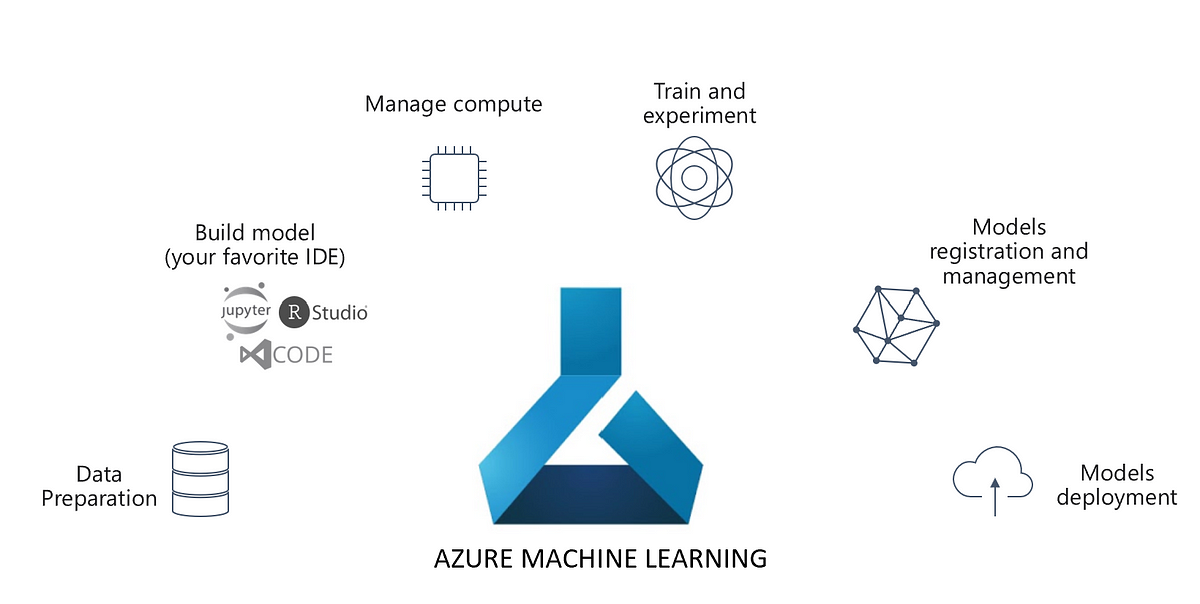
The hallmark of any good tool/platform is its flexibility. With AI models all around, and an explosion of tools to develop to build AI workflows, it gets overwhelming. Thus, it is always convenient to have all the tools we need in one place.
Moreover, AI application development has two methodologies viz. Pre-built AI and Custom AI. With the explosion of Generative AI, the former has gathered a lot of steam, while the latter still accounts for a majority of AI/ML workloads. Hence, a platform that can have pre-built models along with all the requisite infrastructure to build custom models is most desirable. This requirement has given rise to platforms like AWS Sagemaker, Vertex AI, Azure Machine Learning, etc.
Amongst this, Microsoft Azure Machine Learning is a key player, especially after the mainstreaming of Azure Open AI. Earlier, Azure Machine Learning was made only for Custom AI. Prebuilt AI was primarily offered by Azure AI services. While Azure AI is still mainstream, most of the models are now integrated in Azure Machine Learning, along with a host of other open source and proprietary models. Although we have explored quite a few aspects of Azure Machine Learning on this platform earlier, this article, will now look at it in a new light.
Back to the article, Azure Machine Learning now has two major sections: Model as a Service i.e. Model Catalog and Custom Authoring:
Prebuilt AI: Model as a Service – Model Catalog
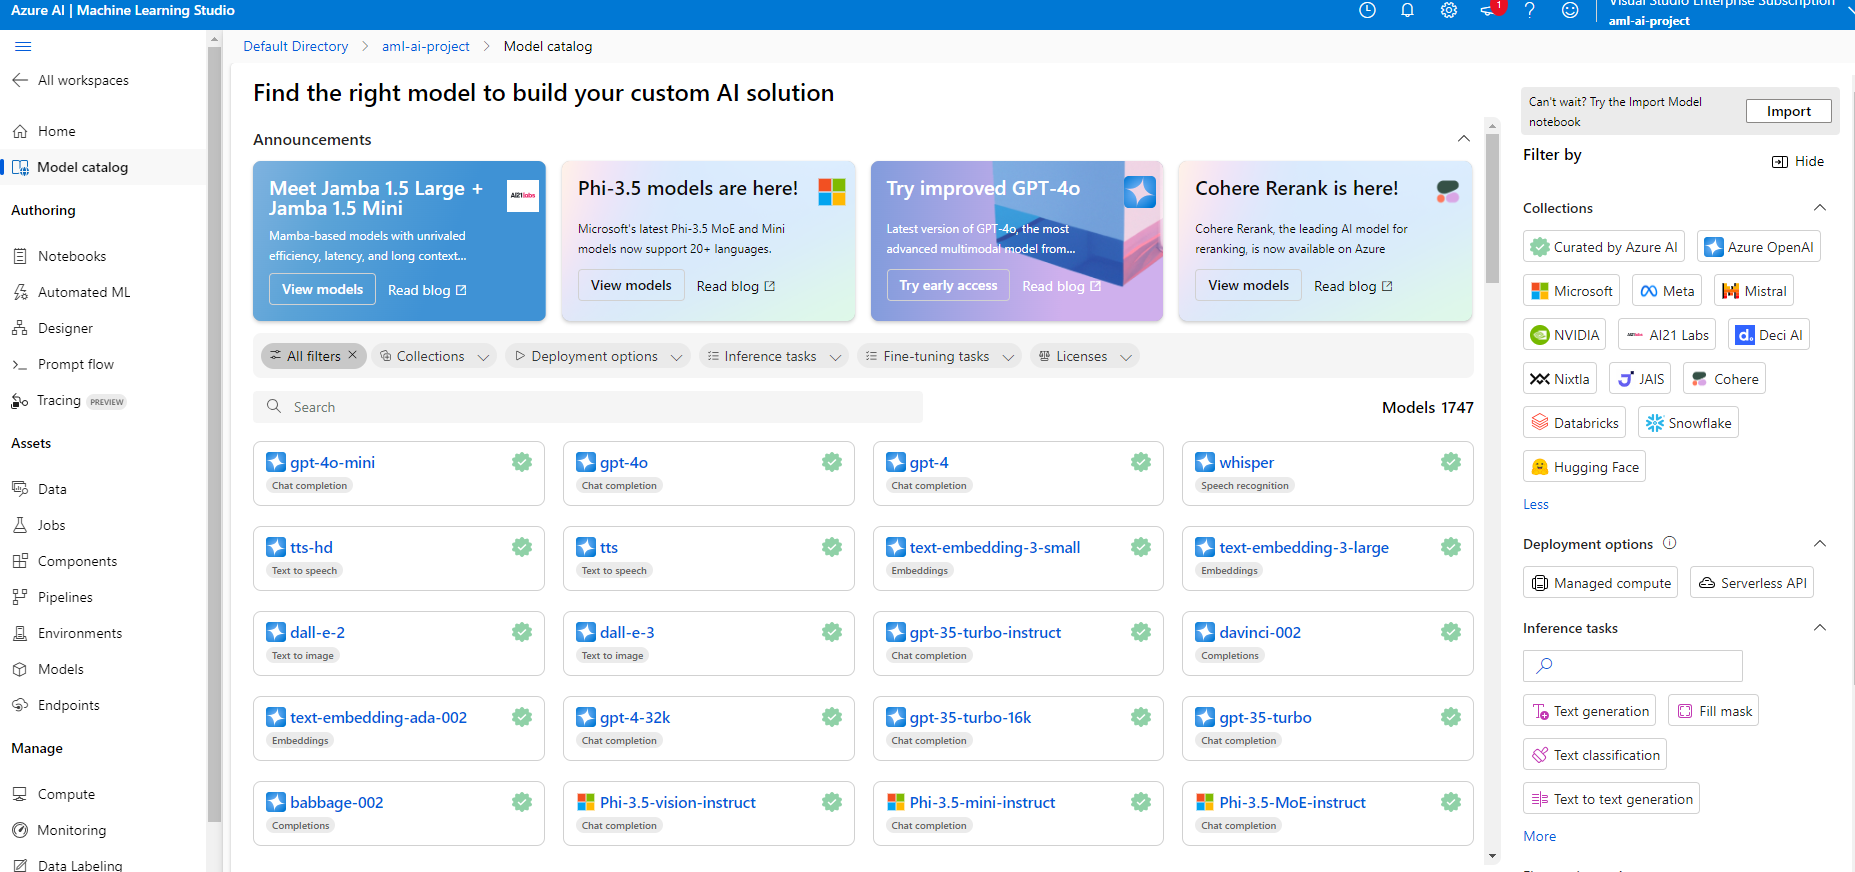
Let’s first explore the pre built AI using Model as a Service, i.e. Model Catalog in the Azure Machine Learning. A simple glance at the pane will give you glimpse of expanse of model categories available to a user.
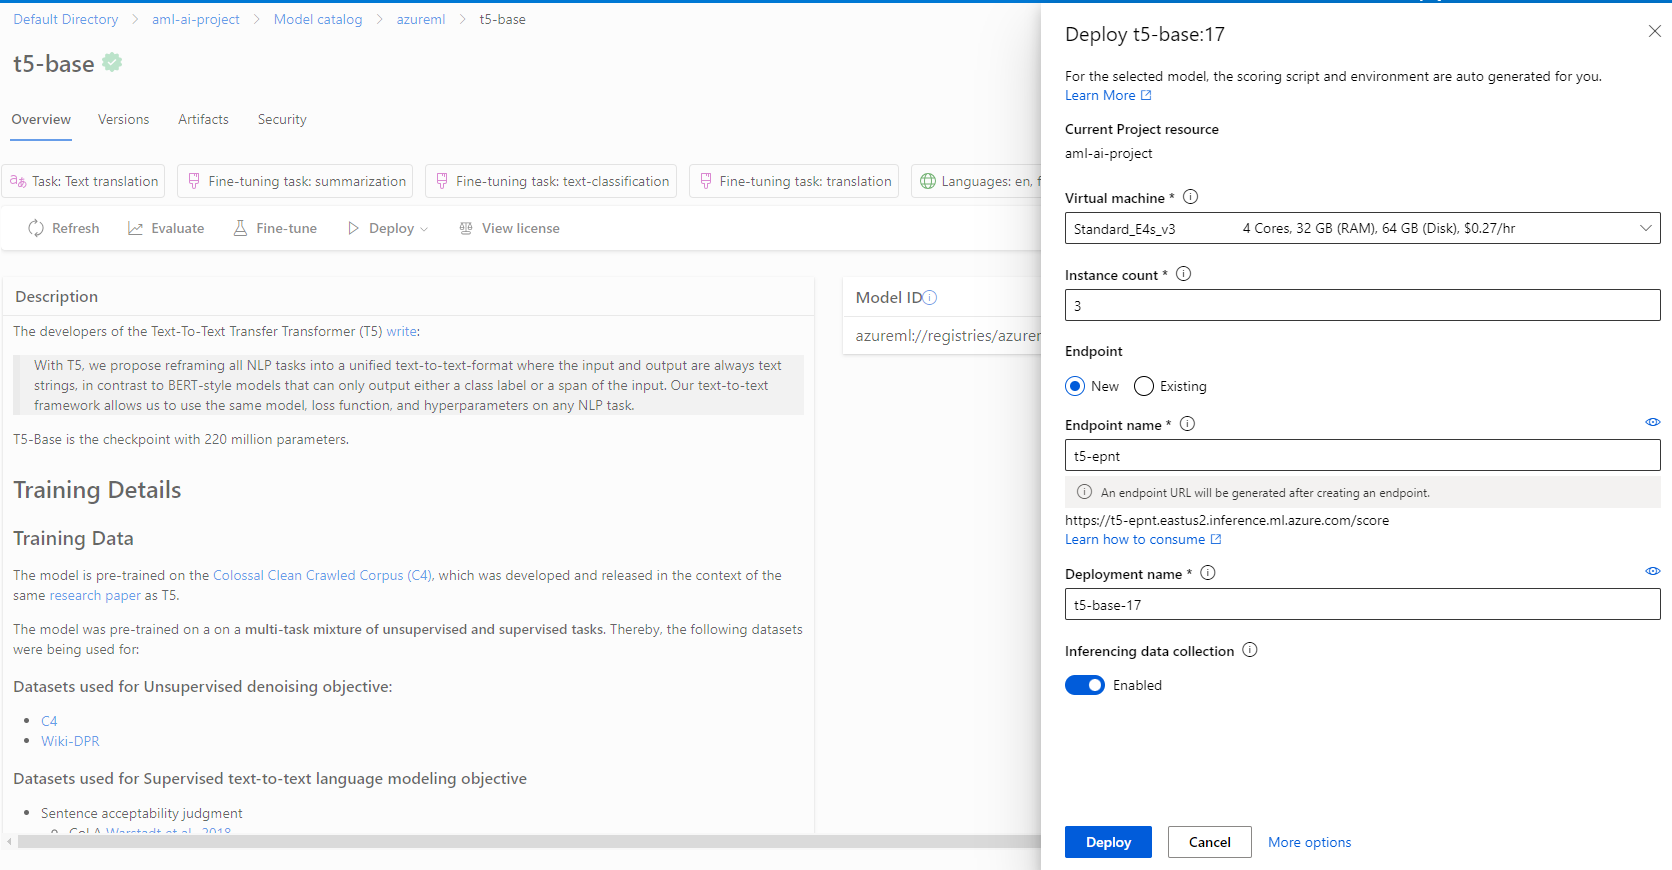
If your subscription has enough authorization, you can use any of the models. For an example, we will deploy a t5 model and show how to use it. Search for t-5 base and click on deploy.
Once the deployment is completed, go to the endpoint and then to the Consume section.
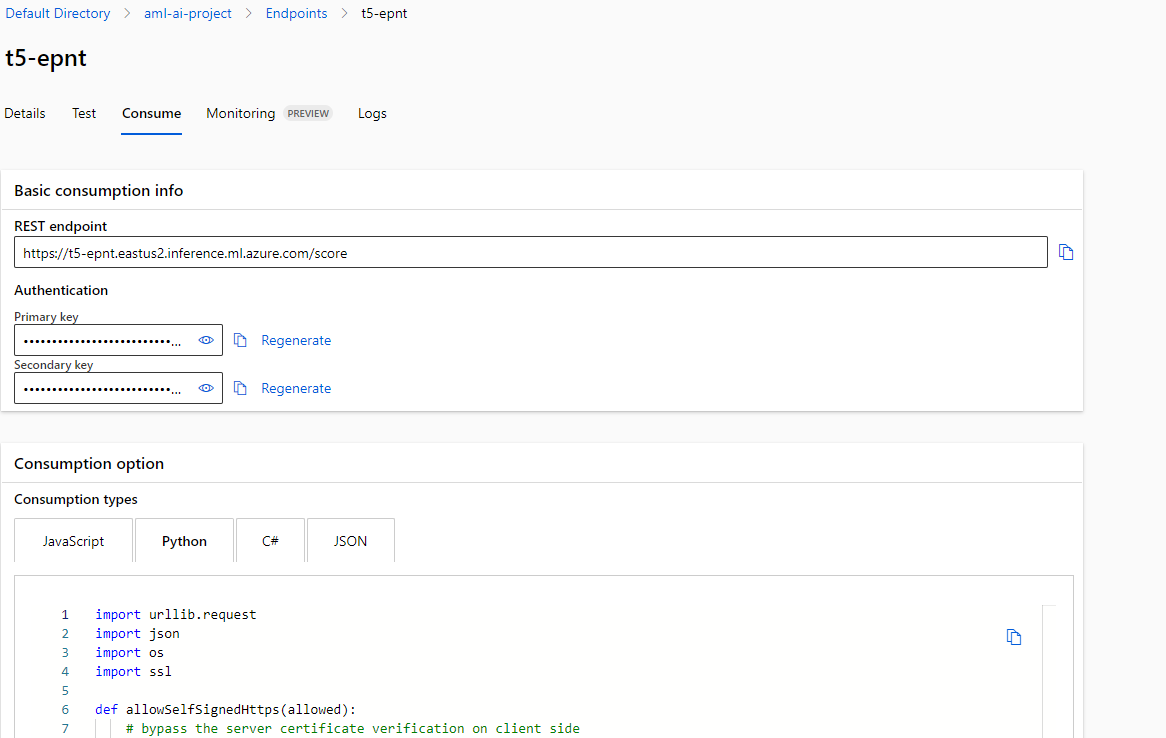
Take the code, copy the key and paste it in the placeholder:
import urllib.request
import json
import os
import ssl

def allowSelfSignedHttps(allowed):

    # bypass the server certificate verification on client side
    if allowed and not os.environ.get('PYTHONHTTPSVERIFY', '') and getattr(ssl, '_create_unverified_context', None):
        ssl._create_default_https_context = ssl._create_unverified_context

allowSelfSignedHttps(True) # this line is needed if you use self-signed certificate in your scoring service.

data = {
  "input_data": [
    "Hello. I am Prasad. I live in Bengaluru."
  ]
}

body = str.encode(json.dumps(data))

url = 'https://t5-epnt.eastus2.inference.ml.azure.com/score'

# Replace this with the primary/secondary key, AMLToken, or Microsoft Entra ID token for the endpoint
api_key = '<Api-Key>'

if not api_key:
    raise Exception("A key should be provided to invoke the endpoint")

headers = {'Content-Type':'application/json', 'Authorization':('Bearer '+ api_key)}
req = urllib.request.Request(url, body, headers)

try:
    response = urllib.request.urlopen(req)
    result = response.read()
    print(result)

except urllib.error.HTTPError as error:
    print("The request failed with status code: " + str(error.code))

    # Print the headers - they include the request ID and the timestamp, which are useful for debugging the failure
    print(error.info())
    print(error.read().decode("utf8", 'ignore'))
Running this script will give you this result: b'[“Hallo, ich bin Prasad und lebe in Bengaluru.”]’
In a similar fashion, any of the models mentioned in the catalog, including Open AI models can be deployed with a few clicks and can be consumed with little effort.
Custom AI: Authoring
As aforementioned, majority of AI/ML workloads are still driven by Custom Model training and deployment. Azure Machine Learning gives you flexibility to train and deploy Machine Learning Models end to end. In our article on Machine Learning System Design we touched upon two main workflows. Accordingly, Machine Learning systems have two major workflows viz. Training and Serving. They are further divided into 6 workflows.
The first three comprise the training end of the ML Systems:
- Data Management
- Orchestrated Experimentation
- Reliable and Repeatable Training
The next three are pertaining to deployment, serving and monitoring.
- Continuous Deployment
- Reliable and Scalable Serving
- Continuous Monitoring
Azure Machine Learning can build each of these workflows. In this article, we will cover a simple example using Azure ML SDK v2. Earlier, we have used Azure ML SDK v1 to demonstrate Training Pipeline, Data Drift Monitoring, Experimentation, etc. All this can be managed via. the authoring pane in the Azure Machine Learning.
Using these authoring tools, we will train and deploy a model in a quickfire model using SDK v2.
Demo Time
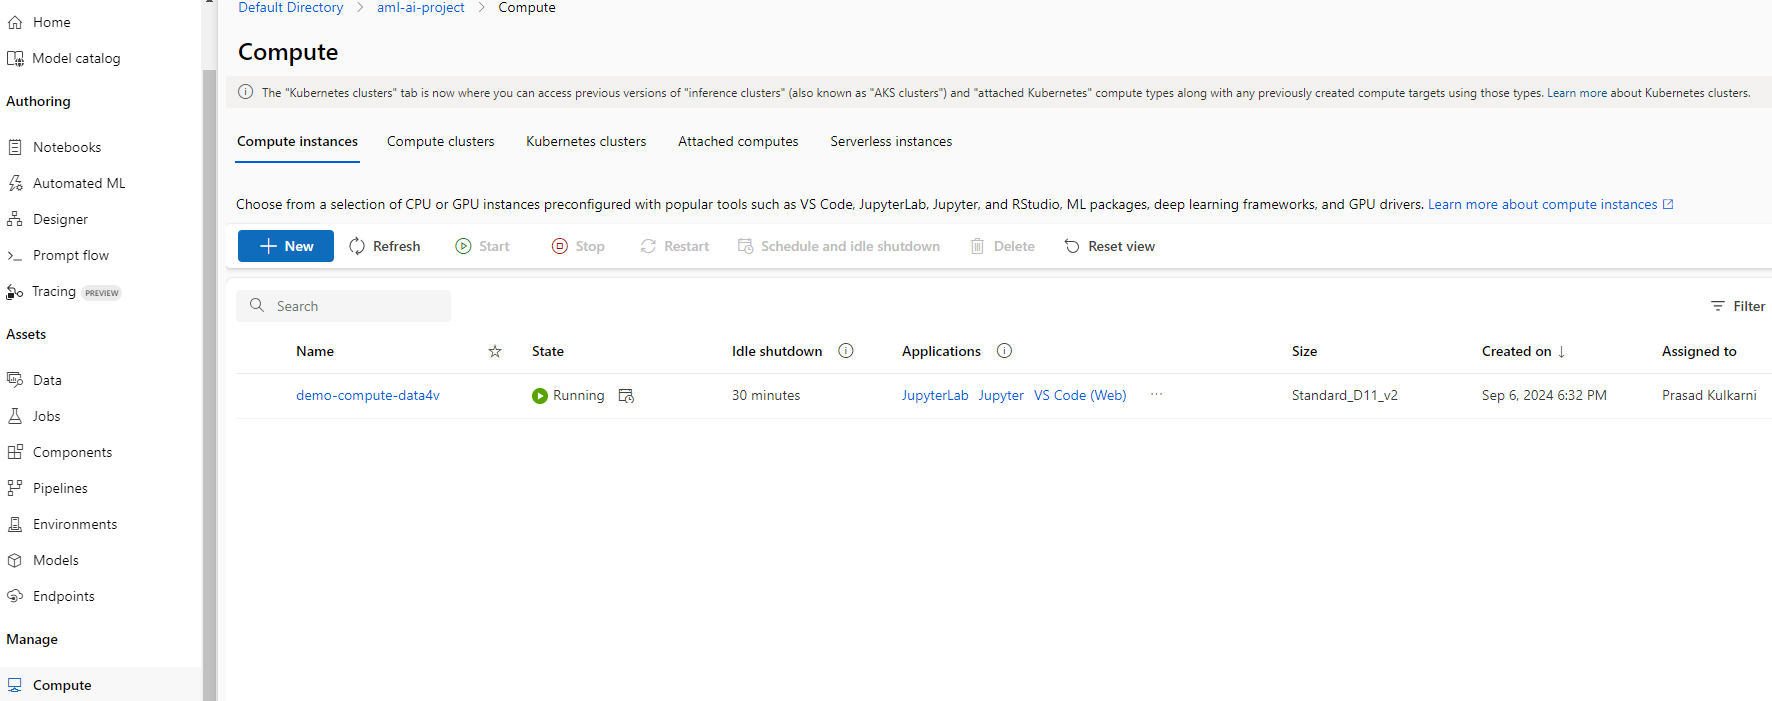
We start the demo by creating a compute instance. A compute instance is the dev environment which has tools like Jupyter notebooks. The instances can be connected and run in Visual Studio Code.
In this demo, we use VS Code (Desktop) option. Clicking on the same will open up a VS Code window in your machine. This is how it looks like:

Create a new notebook and run the following cells:

Create Credentials and Compute Cluster
First, let’s create a credential object:
# Handle to the workspace
from azure.ai.ml import MLClient

# Authentication package
from azure.identity import DefaultAzureCredential
credential = DefaultAzureCredential()
Next, create a ml client object:
# Get a handle to the workspace
ml_client = MLClient(
    credential=credential,
    subscription_id="<your-subscription-id>",
    resource_group_name="ai-experiments",
    workspace_name="aml-ai-project",
)
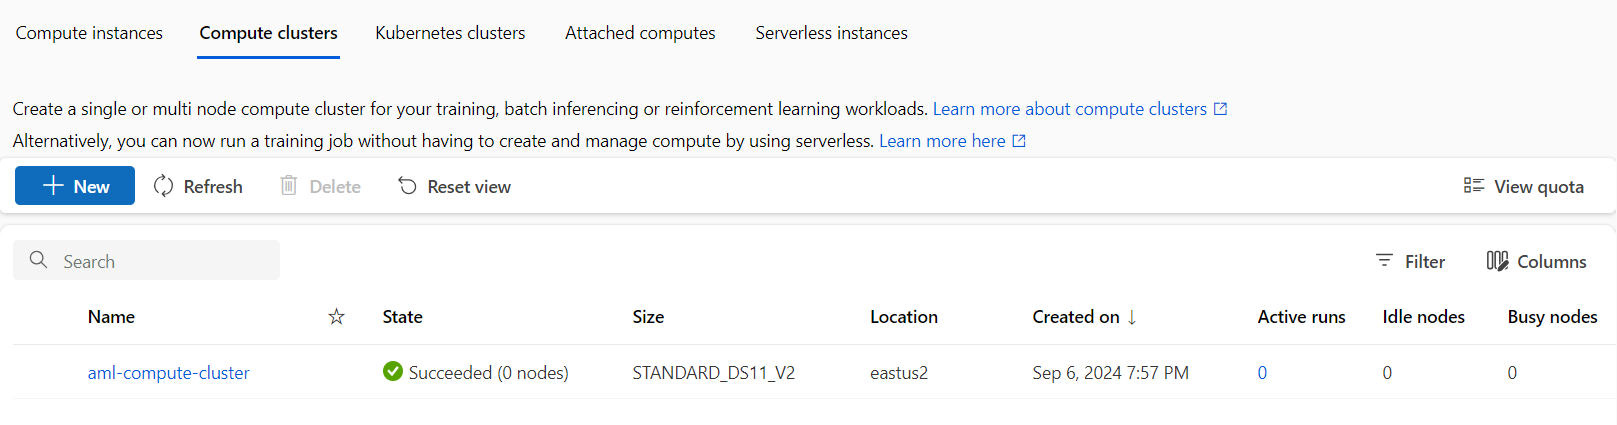
Now, in order to run the training script, you need a compute cluster. You can run the training on compute instance. However, for faster training, compute cluster is recommended:
from azure.ai.ml.entities import AmlCompute
# Name assigned to the compute cluster

cpu_compute_target = "aml-compute-cluster"

try:
    # let's see if the compute target already exists

    cpu_cluster = ml_client.compute.get(cpu_compute_target)
    print(
        f"You already have a cluster named {cpu_compute_target}, we'll reuse it as is."
    )

except Exception:
    print("Creating a new cpu compute target...")

    # Let's create the Azure Machine Learning compute object with the intended parameters
    cpu_cluster = AmlCompute(
        name=cpu_compute_target,
        # Azure Machine Learning Compute is the on-demand VM service
        type="amlcompute",
        # VM Family
        size="STANDARD_DS11_V2",

        # Minimum running nodes when there is no job running
        min_instances=0,
        # Nodes in cluster
        max_instances=1,

        # How many seconds will the node running after the job termination

        idle_time_before_scale_down=180,
        # Dedicated or LowPriority. The latter is cheaper but there is a chance of job termination
        tier="Dedicated",
    )

    print(
        f"AMLCompute with name {cpu_cluster.name} will be created, with compute size {cpu_cluster.size}"
    )

    # Now, we pass the object to MLClient's create_or_update method
    cpu_cluster = ml_client.compute.begin_create_or_update(cpu_cluster)
Go to the portal and check the compute cluster:
Create an Environment
Now, create an environment which packages all the dependencies required to run the training and deployment. First create a directory for dependency file.
import os

dependencies_dir = "./dependencies"
os.makedirs(dependencies_dir, exist_ok=True)
Write the file containing the dependencies:
%%writefile {dependencies_dir}/conda.yaml
name: model-env
channels:
  - conda-forge
dependencies:
  - python=3.8
  - numpy=1.21.2
  - pip=21.2.4
  - scikit-learn=0.24.2
  - scipy=1.7.1
  - pandas>=1.1,<1.2
  - pip:
    - inference-schema[numpy-support]==1.3.0
    - xlrd==2.0.1
    - mlflow== 2.6.0
    - azureml-mlflow==1.42.0
    - psutil>=5.8,<5.9
    - tqdm>=4.59,<4.60
    - ipykernel~=6.0
    - matplotlib
Next, create an environment:
from azure.ai.ml.entities import Environment

custom_env_name = "credit-card-scikit-38"

custom_job_env = Environment(
    name=custom_env_name,
    description="Custom environment for Credit Card Defaults job",
    tags={"scikit-learn": "0.24.2"},
    conda_file=os.path.join(dependencies_dir, "conda.yaml"),
    image="mcr.microsoft.com/azureml/openmpi3.1.2-ubuntu18.04:latest",
)

custom_job_env = ml_client.environments.create_or_update(custom_job_env)
print(
    f"Environment with name {custom_job_env.name} is registered to workspace, the environment version is {custom_job_env.version}"
)
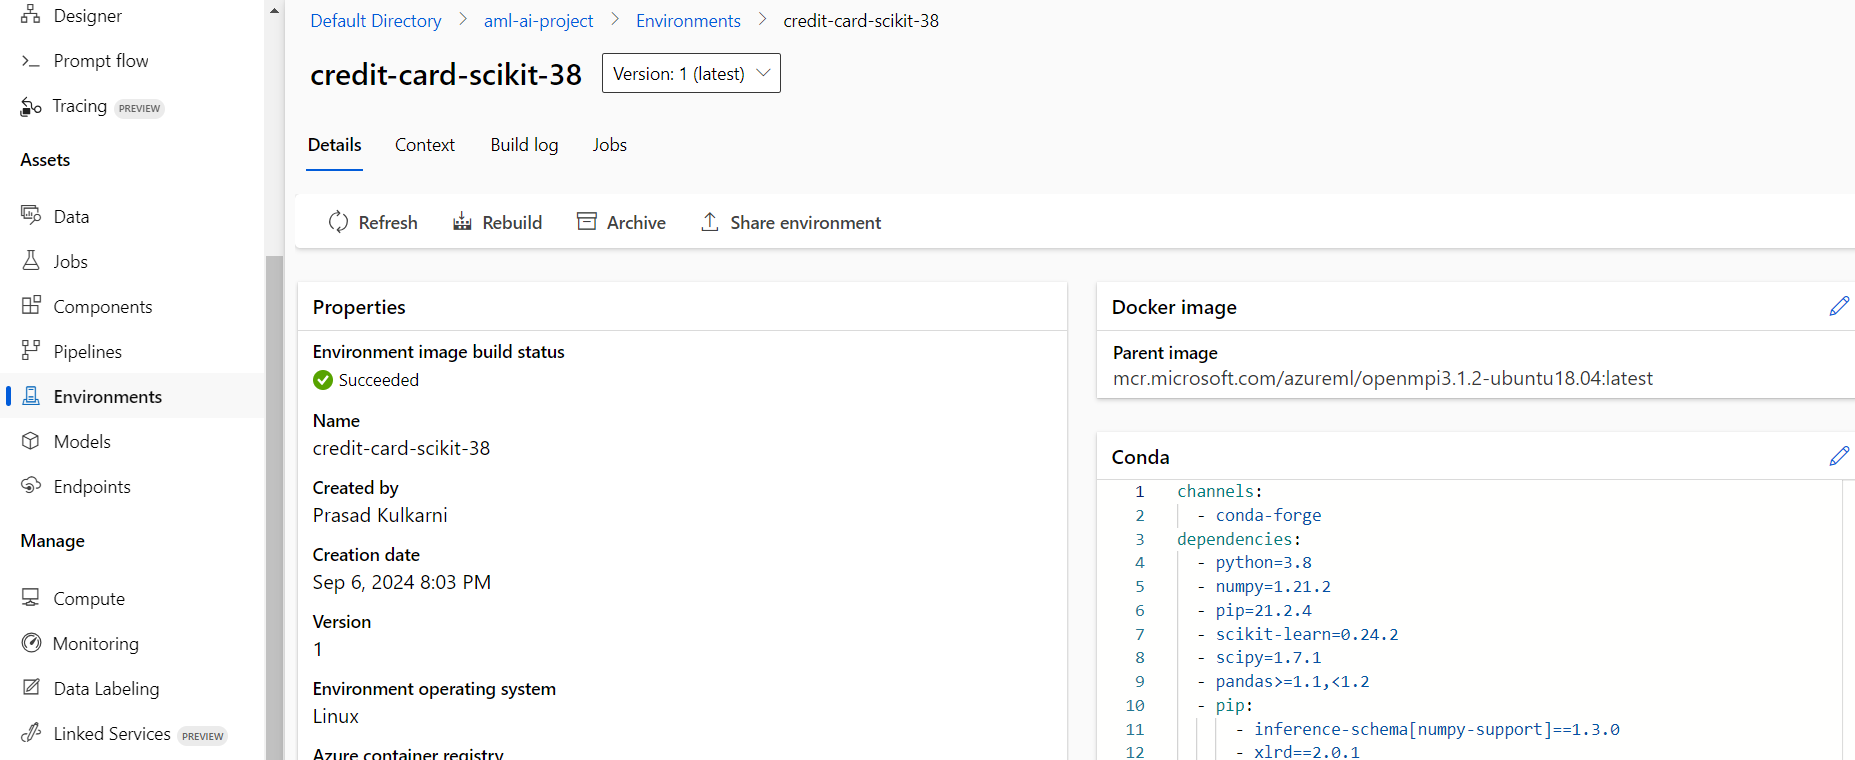
Check the portal under the environments section.
Create a training job
We now create a training job. Create a directory for the same.
import os

train_src_dir = "./src"
os.makedirs(train_src_dir, exist_ok=True)
Write the training script:
%%writefile {train_src_dir}/main.py

import os
import argparse
import pandas as pd
import mlflow
import mlflow.sklearn
from sklearn.ensemble import GradientBoostingClassifier
from sklearn.metrics import classification_report
from sklearn.model_selection import train_test_split

def main():
    """Main function of the script."""

    # input and output arguments
    parser = argparse.ArgumentParser()
    parser.add_argument("--data", type=str, help="path to input data")
    parser.add_argument("--test_train_ratio", type=float, required=False, default=0.25)
    parser.add_argument("--n_estimators", required=False, default=100, type=int)
    parser.add_argument("--learning_rate", required=False, default=0.1, type=float)
    parser.add_argument("--registered_model_name", type=str, help="model name")

    args = parser.parse_args()

    # start Logging
    mlflow.start_run()

    # enable autologging
    mlflow.sklearn.autolog()

    ###################
    #<prepare the data>
    ###################

    print(" ".join(f"{k}={v}" for k, v in vars(args).items()))
    print("input data:", args.data)

    credit_df = pd.read_csv(args.data, header=1, index_col=0)
    mlflow.log_metric("num_samples", credit_df.shape[0])
    mlflow.log_metric("num_features", credit_df.shape[1] - 1)

    train_df, test_df = train_test_split(
        credit_df,
        test_size=args.test_train_ratio,
    )

    ###################
    #</prepare the data>
    ###################

    ##################
    #<train the model>
    ##################

    # extracting the label column
    y_train = train_df.pop("default payment next month")

    # convert the dataframe values to array
    X_train = train_df.values

    # extracting the label column
    y_test = test_df.pop("default payment next month")

    # convert the dataframe values to array
    X_test = test_df.values

    print(f"Training with data of shape {X_train.shape}")

    clf = GradientBoostingClassifier(
        n_estimators=args.n_estimators, learning_rate=args.learning_rate
    )

    clf.fit(X_train, y_train)
    y_pred = clf.predict(X_test)
    print(classification_report(y_test, y_pred))

    ##################
    #</train the model>
    ##################

    ##########################
    #<save and register model>
    ##########################

    # registering the model to the workspace
    print("Registering the model via MLFlow")

    mlflow.sklearn.log_model(
        sk_model=clf,
        registered_model_name=args.registered_model_name,
        artifact_path=args.registered_model_name,
    )

    # saving the model to a file
    mlflow.sklearn.save_model(
        sk_model=clf,
        path=os.path.join(args.registered_model_name, "trained_model"),
    )


    # stop Logging
    mlflow.end_run()

if __name__ == "__main__":
    main()
Create the training job.
from azure.ai.ml import command
from azure.ai.ml import Input

registered_model_name = "credit_defaults_model"

job = command(
    inputs=dict(
        data=Input(
            type="uri_file",
            #path="https://azuremlexamples.blob.core.windows.net/datasets/credit_card/default%20of%20credit%20card%20clients.csv",
            path="azureml:credit-card-default:1",
        ),

        test_train_ratio=0.2,
        learning_rate=0.25,
        registered_model_name=registered_model_name,
    ),

    code="./src/",  # location of source code
    command="python main.py --data ${{inputs.data}} --test_train_ratio ${{inputs.test_train_ratio}} --learning_rate ${{inputs.learning_rate}} --registered_model_name ${{inputs.registered_model_name}}",
    environment="AzureML-sklearn-1.0-ubuntu20.04-py38-cpu@latest",
    experiment_name="train_model_credit_default_prediction_cluster",
    compute=cpu_compute_target,
    display_name="credit_default_prediction",
)
ml_client.create_or_update(job)
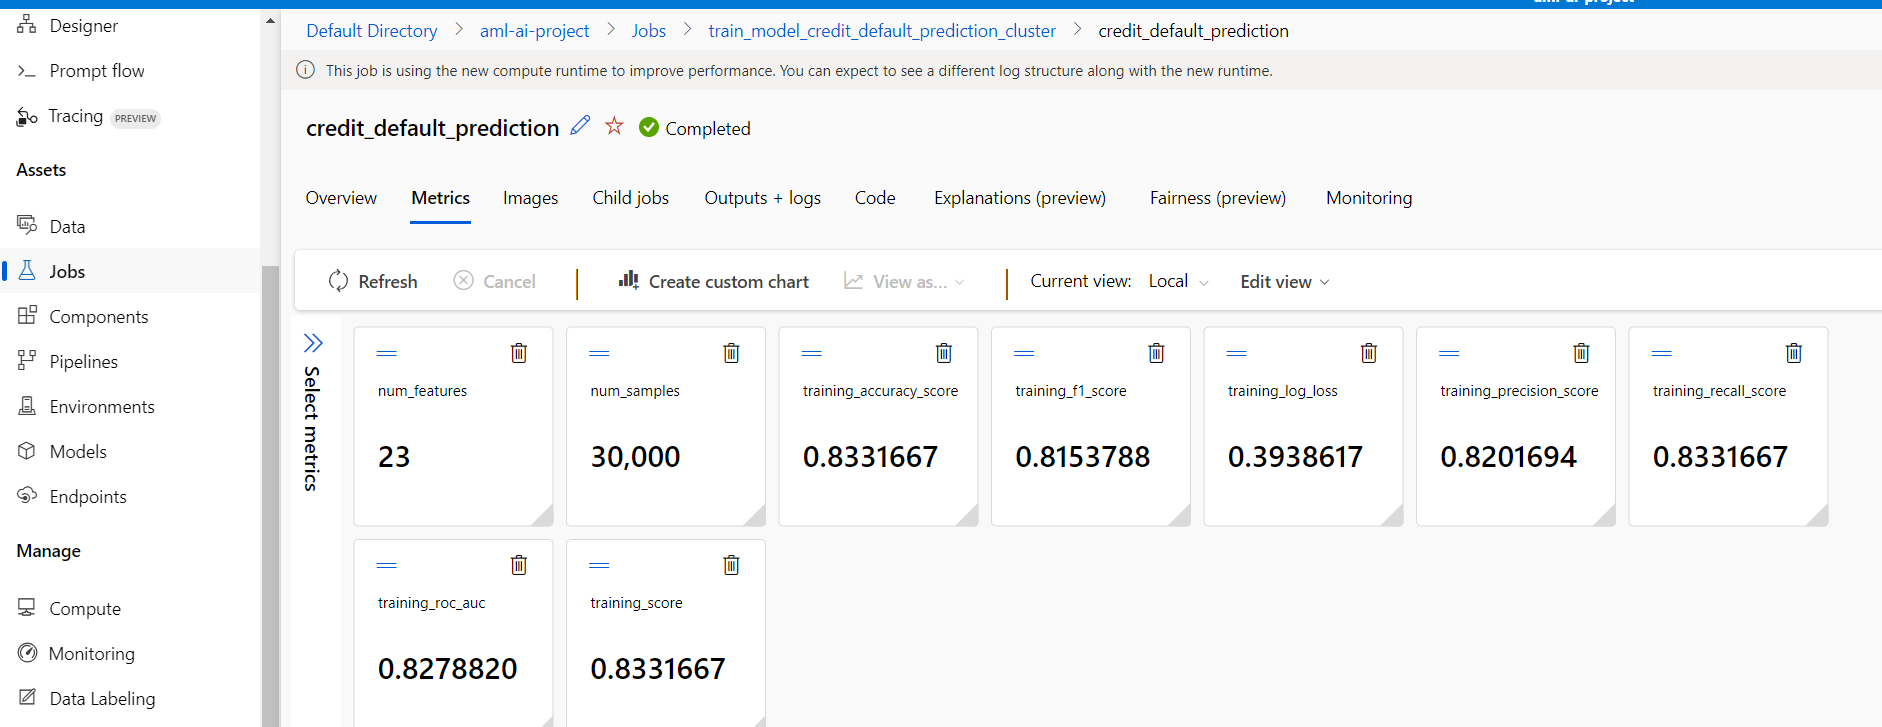
Go to the portal and check under the Jobs. Check the metrics.
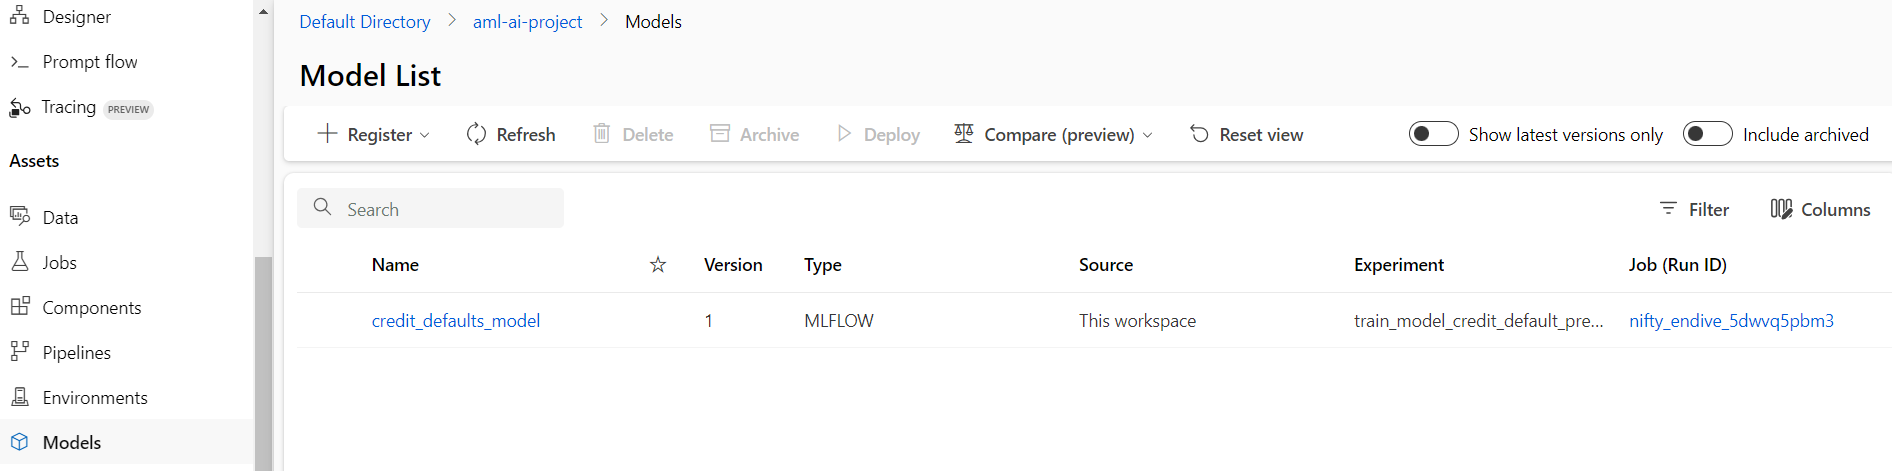
Here is the registered model.
Create an Online Endpoint and Deployment
Now, since the model is registered, we now create an online endpoint and the deployment. Managed online endpoints are a special feature of Azure Machine Learning, where ML endpoints’ infrastructure are managed by Azure. For more details about Azure Machine Learning, here is our old article Managed Online Endpoints in Azure Machine Learning.
Anyway, here is the online endpoint creation script:
import uuid

# Creating a unique name for the endpoint
online_endpoint_name = "credit-endpoint-" + str(uuid.uuid4())[:8]
from azure.ai.ml.entities import (
    ManagedOnlineEndpoint,
    ManagedOnlineDeployment,
    Model,
    Environment,
)

# create an online endpoint
endpoint = ManagedOnlineEndpoint(
    name=online_endpoint_name,
    description="this is an online endpoint",
    auth_mode="key",
    tags={
        "training_dataset": "credit_defaults",
        "model_type": "sklearn.GradientBoostingClassifier",
    },
)

endpoint = ml_client.online_endpoints.begin_create_or_update(endpoint).result()
print(f"Endpoint {endpoint.name} provisioning state: {endpoint.provisioning_state}")

endpoint = ml_client.online_endpoints.get(name=online_endpoint_name)
print(
   f'Endpoint "{endpoint.name}" with provisioning state "{endpoint.provisioning_state}" is retrieved'
)
Next, let’s create a deployment. For that, first retrieve the registered model:
# Let's pick the latest version of the model
registered_model_name = "credit_defaults_model"
latest_model_version = max(
    [int(m.version) for m in ml_client.models.list(name=registered_model_name)]
)
Next, let’s create a deployment:
# picking the model to deploy. Here we use the latest version of our registered model
model = ml_client.models.get(name=registered_model_name, version=latest_model_version)

# create an online deployment.
blue_deployment = ManagedOnlineDeployment(
    name="blue",
    endpoint_name=online_endpoint_name,
    model=model,
    instance_type="Standard_E2s_v3",
    instance_count=1,
)
blue_deployment = ml_client.begin_create_or_update(blue_deployment).result()
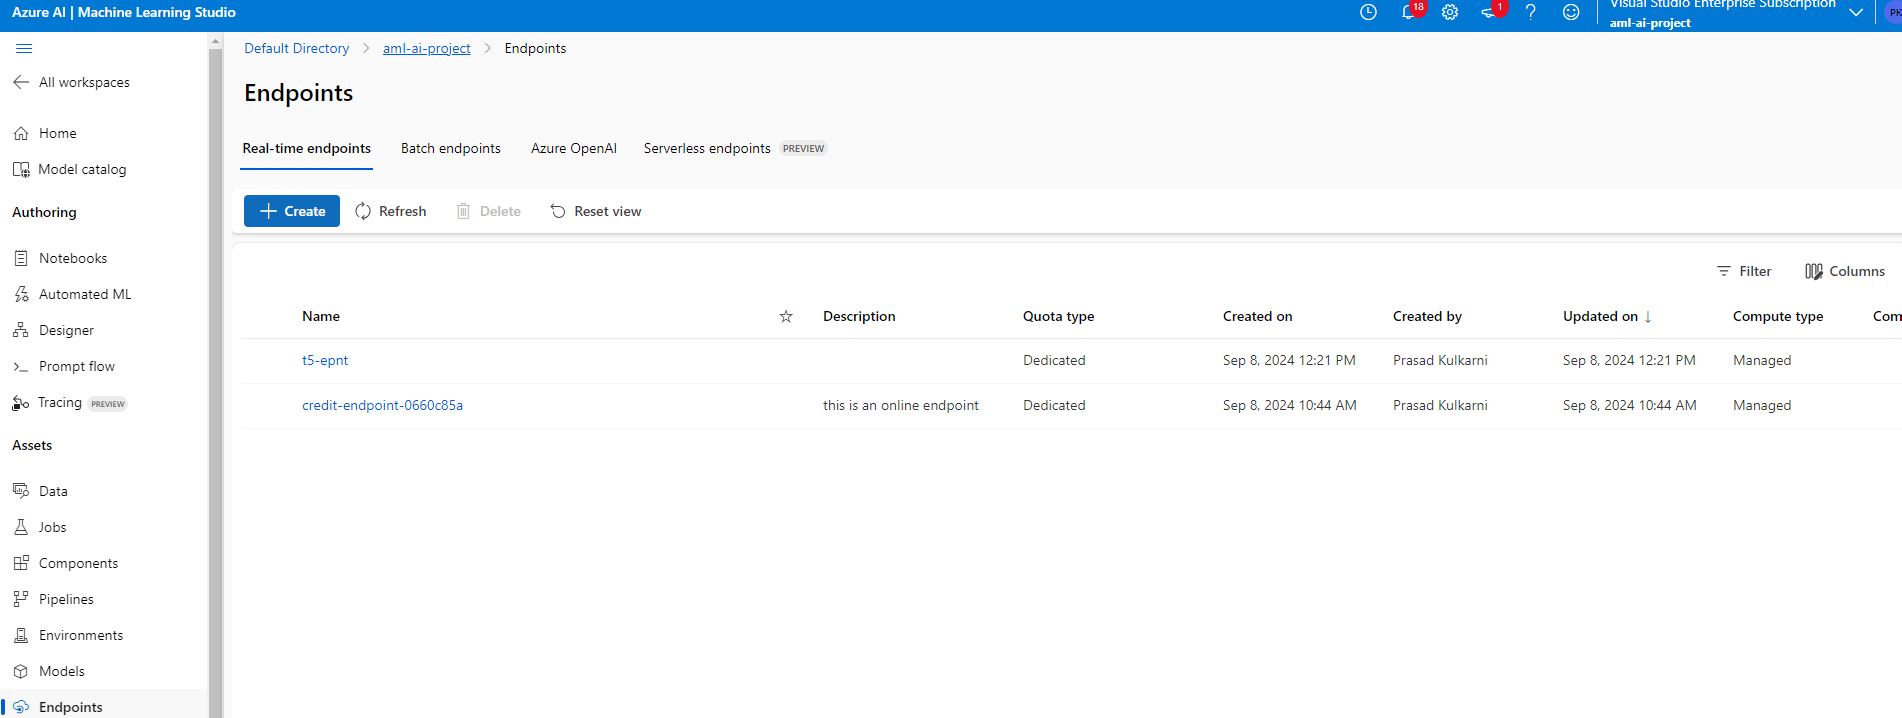
Notice, that the earlier t5 endpoint is actually a managed online endpoint.
Test the Endpoint
Once the deployment is complete, test the endpoint. Create a folder to request json.
deploy_dir = "./deploy"
os.makedirs(deploy_dir, exist_ok=True)
Create a request json.
%%writefile {deploy_dir}/sample-request.json

{
  "input_data": {
    "columns": [0,1,2,3,4,5,6,7,8,9,10,11,12,13,14,15,16,17,18,19,20,21,22],
    "index": [0, 1],
    "data": [
            [20000,2,2,1,24,2,2,-1,-1,-2,-2,3913,3102,689,0,0,0,0,689,0,0,0,0],
            [10, 9, 8, 7, 6, 5, 4, 3, 2, 1, 10, 9, 8, 7, 6, 5, 4, 3, 2, 1, 10, 9, 8]
        ]
  }
}
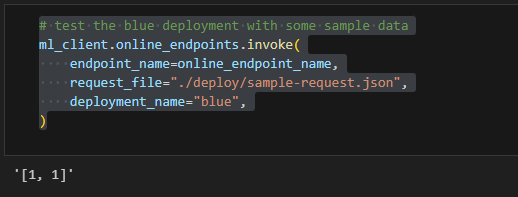
Lastly, test the endpoint:
# test the blue deployment with some sample data
ml_client.online_endpoints.invoke(
    endpoint_name=online_endpoint_name,
    request_file="./deploy/sample-request.json",
    deployment_name="blue",
)
Lastly, delete the endpoint to save the cost.
ml_client.online_endpoints.begin_delete(name=online_endpoint_name)
Conclusion – Azure ML is the complete AI suite?
We have seen that Azure Machine Learning has both capabilities i.e. pre built AI and custom AI, making it a complete AI suite. We hope this article is useful. However, we do not guarantee completeness or accuracy.