Strongly recommended reading: Azure Synapse Analytics: Azure SQL Data Warehouse revamped
In the aforementioned article, we gave an introduction to Azure Synapse Analytics, the new avatar of Azure Sql Datawarehouse. Furthermore, we dived deep into the apparent philosophy and motivation behind the Synapse. Reading through the article will reveal that Synapse Analytics is set to be the new end to end analytics solution in Microsoft Azure. Having said that, in this article, we will dive into it hands-on. Let’s take a first look at Synapse Analytics. Accordingly, we will see how to load data into the Synapse.
Step1: Creating Synapse Analytics
Firstly, go to your Azure Portal and search for Synapse analytics. Click on create and fill in the details. If you have a server use the same or else create a new one.
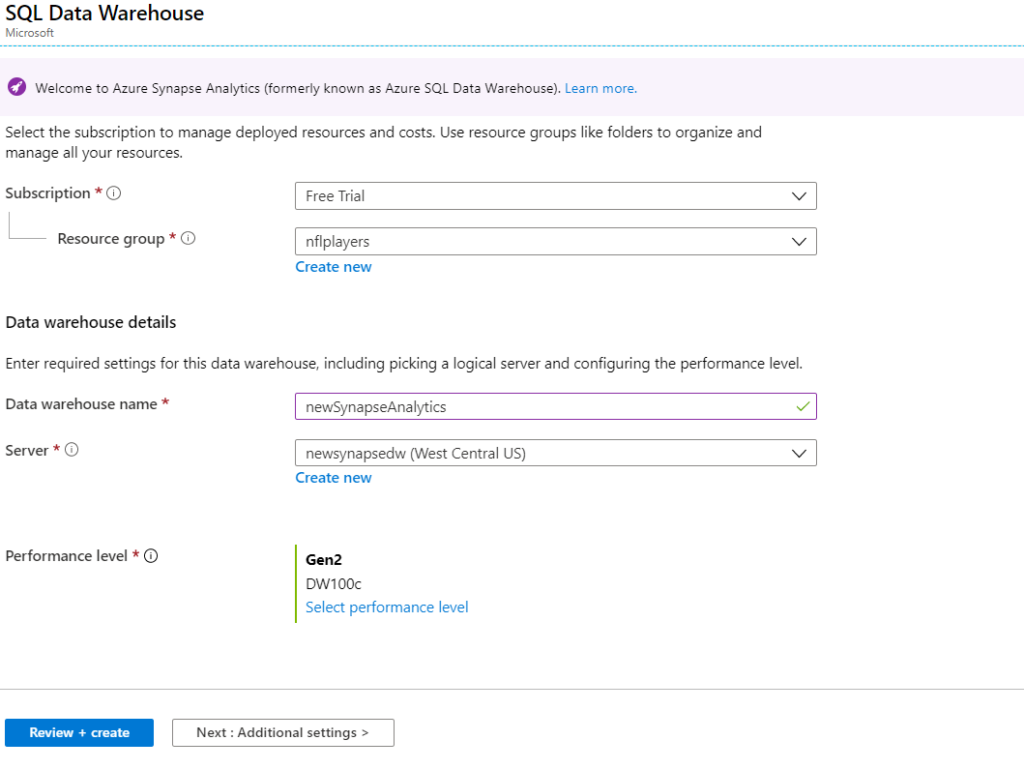
Else, create a server by clicking on Create new option below the Server textbox in the above image.
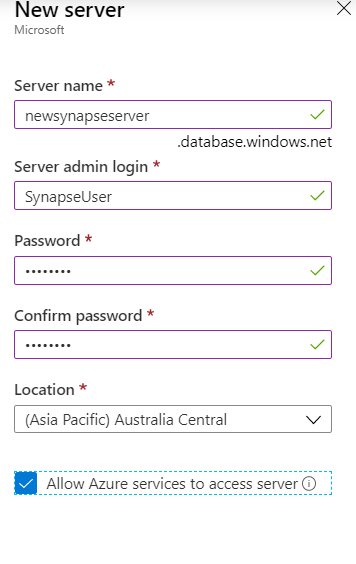
Please remember to select the checkbox ‘Allow Azure services to access server’.
Step 2: Exploring Common Tasks
After creating the server and the database, go to the explorer. Let’s explore the common tasks involved in the server. Take a look at the image below.
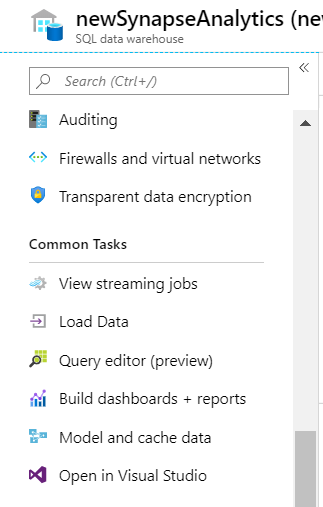
We can see that the common tasks include an interface to load streaming data, batch data. These two are followed by the query editor for querying data. Furthermore, it has an interface with PowerBI to build dashboards and reports. Lastly, we have interface to Azure Analysis service and a visual studio interface to develop applications. Hence, we can see that we have provisions to build an end to end system using the Azure Synapse Analytics. In this article, we will load batch data from Azure Data Lake into the Synapse using the ‘Load Data’.
Step 3: Create a Sink Table
The Load Data is fundamentally Azure Data Factory v1 integration into Synapse, in order to bring in ELT capabilities to it. Hence, in order to load data, we need to create an ADF resource. However, before that, we need to have a table in place. Click on Query editor and sign in using Sql Authentication. Use the credentials created during server creation. Alternatively, you can also use Azure Active Directory authentication.
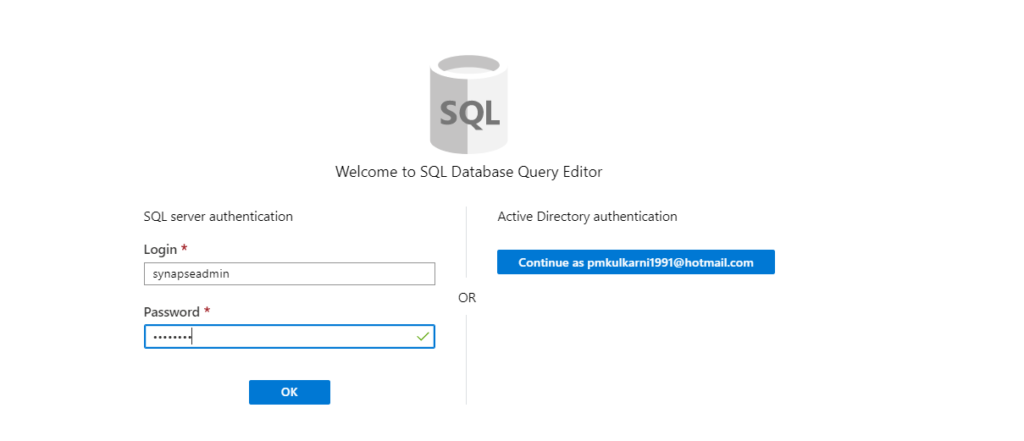
You will see that it fails at authentication since the client IP is not whitelisted.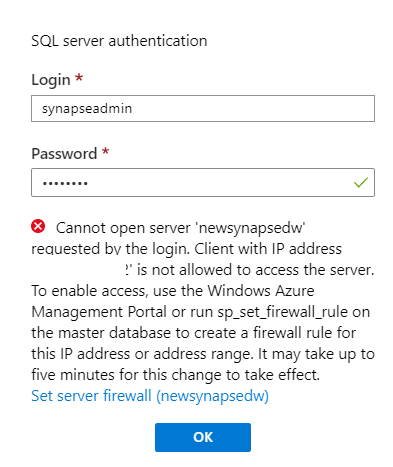
In the Overview tab of the synapse, go to the Server name.

In the Sql Server, go to the firewall and virtual networks.

Add client IP.

Finally, place the create table in the query editor.

Here is the script:
CREATE TABLE [dbo].[InjuryRecords] (

    [PlayerKey] varchar(100) COLLATE SQL_Latin1_General_CP1_CI_AS NULL,

    [GameID] varchar(100) COLLATE SQL_Latin1_General_CP1_CI_AS NULL,

    [PlayKey] varchar(100) COLLATE SQL_Latin1_General_CP1_CI_AS NULL,

    [BodyPart] varchar(100) COLLATE SQL_Latin1_General_CP1_CI_AS NULL,

    [Surface] varchar(100) COLLATE SQL_Latin1_General_CP1_CI_AS NULL,

    [DM_M1] int NULL,

    [DM_M7] int NULL,

    [DM_M28] int NULL,

    [DM_M42] int NULL

)

WITH (CLUSTERED COLUMNSTORE INDEX, DISTRIBUTION = ROUND_ROBIN);
Please note the last line i.e. Clustered Columnstore Index and the Distribution. Read this article to know more about the Clustered Columnstore Index. However, a more important concept is Distribution, which comes all the way from Azure Sql Datawarehouse days. We know that Azure Synapse (Sql DW) is based on the concept of distributed computing. The term ‘Distribution = Round_Robin’ means that during computation, the rows of the table are distributed to the compute node in a round-robin fashion. Similarly, we can use a Hash distribution which distributes data to the compute node based on the Hashed value of a particular column (usually the unique column). To know more about distribution, refer to this link.
Step 4: Load Data to Azure Synapse Analytics
Once you have the table ready, let’s load the data into it. Go to Load Data under common tasks and it will open up a window like this.
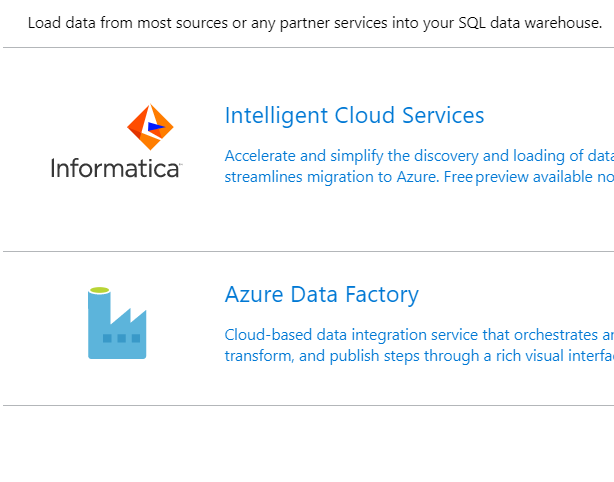
It has two options viz. Informatica Cloud Services and Azure Data Factory. Let’s choose Azure Data Factory which opens a new ADF v1 window. Thereafter, either choose an existing ADF or create a new one. We will choose an existing one named synapseADF. Select Load data. 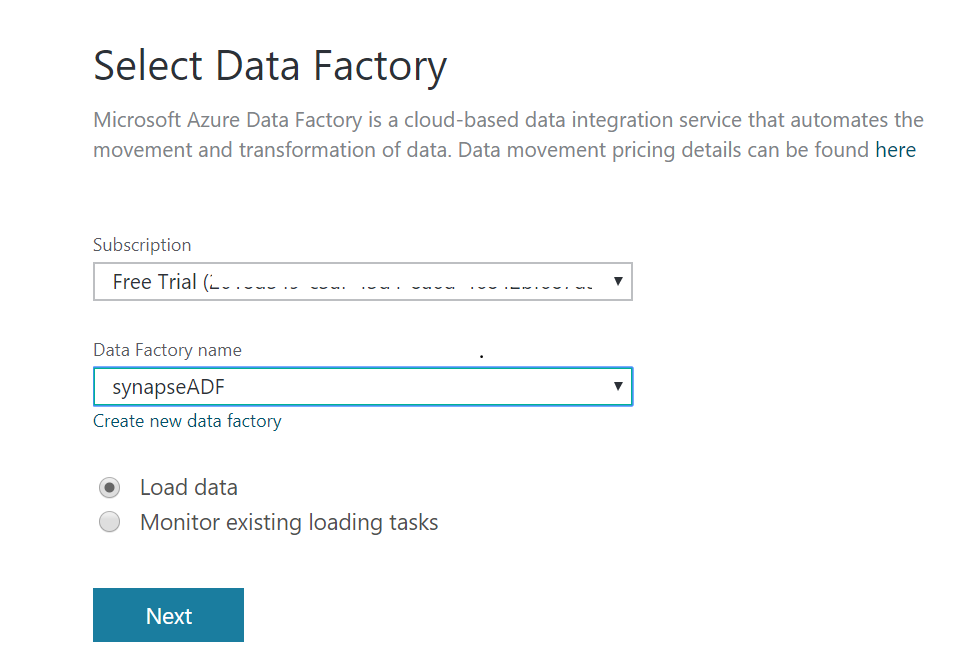
Name the ADF appropriately and choose Run once now.
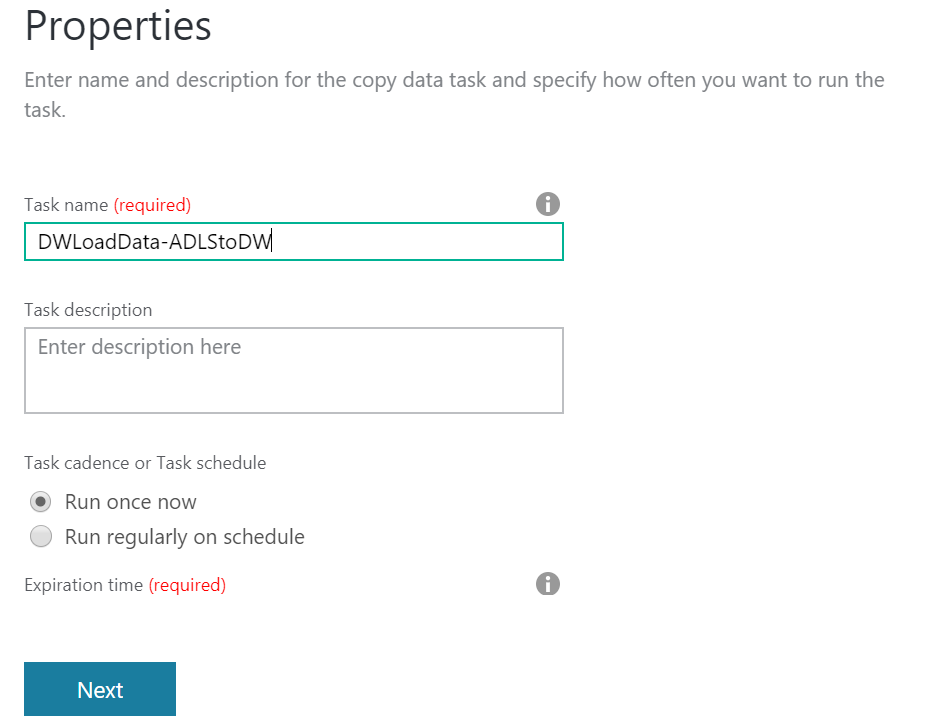
Next, choose Azure Blob Storage as a source. Please note that ADLS gen2 as a source is not available in ADF v1. However, Azure Blob Storage connection works instead.
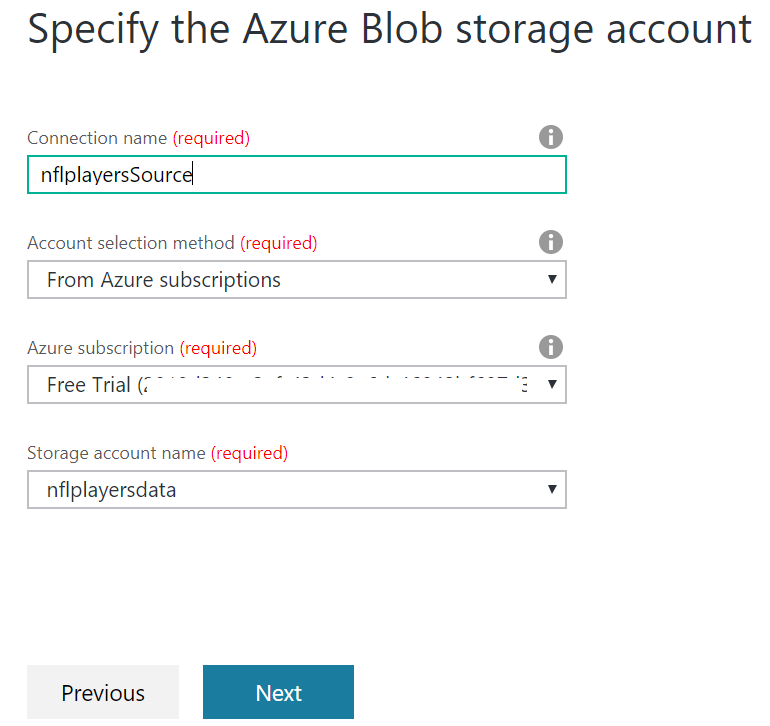
Please note that ADF v1 uses Account key authentication by default. In ADF v2 we have multiple ways to authenticate ADF against the storage account. For more details read the below article.
Related article: Managed Identity between Azure Data Factory and Azure storage
Select the file Injury Records.

Complete the source configuration and then the destination configuration as shown below.
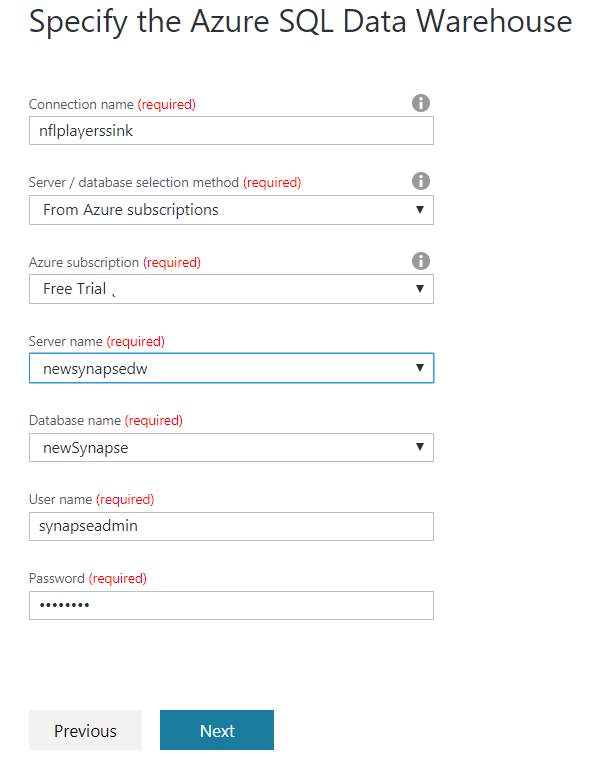
Complete all the remaining settings and run the pipeline. This setup creates an intermediate staging storage account. The pipeline run looks like the below image.

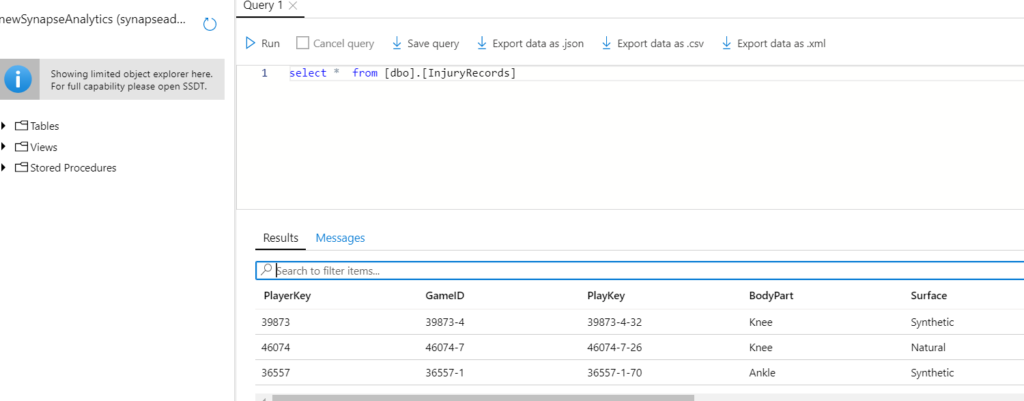
Open the query editor window and view results.
Conclusion
Please note that this service is brand new in the Microsoft Azure Data stack and it will evolve with time. Stay tuned to know more. Hope you find it helpful.

